

How to Set Up Your Samsung Printer in Minutes can be a daunting task, especially if you’re not tech-savvy. However, with the right guidance, it can be a breeze. Samsung printers are known for their reliability, easy-to-use features, and advanced technology. In this post, we’ll guide you through the process of setting up your Samsung printer in just a few minutes. We’ll cover everything from unboxing the printer to connecting it to your computer or mobile device and even troubleshooting common issues. Whether you’re a Windows or Mac user or prefer to print from your smartphone or tablet, this step-by-step guide will make setting up your Samsung printer a hassle-free and enjoyable experience. So, let’s get started and have your printer up and running in no time!
1. Introduction to Samsung printers
Samsung printers are known for their high quality and reliability. They are designed to meet the needs of both home and office users, with a range of features that make printing fast, easy, and convenient. Whether you need to print documents, photos, or graphics, Samsung printers offer excellent performance and exceptional print quality.
One of the most appealing aspects of Samsung printers is their ease of use. They are designed to be user-friendly, with intuitive interfaces and simple set-up processes. Even if you’ve never set up a printer before, you’ll find that Samsung printers are straightforward and easy to get started with.
Samsung printers are available in a range of models, from basic inkjet printers to advanced laser printers. Depending on your needs, you can choose a printer that’s ideal for your home or office. With a Samsung printer, you’ll enjoy the reliable performance, excellent print quality, and hassle-free printing – all in a compact and stylish package. So, let’s get started and learn how to set up your Samsung printer in just a few minutes!
2. Unboxing the Samsung printer: What’s inside the box?
Unboxing a new Samsung printer can be an exciting experience. Before getting started, make sure you have all the necessary components that came with the printer. Typically, a Samsung printer box includes the printer itself, power cable, USB cable, starter toner cartridge, user manual, and installation CD.
The printer should be carefully removed from the box, ensuring that no damage is done to any of the components. Remove all the protective tapes, covers, and packaging materials from the printer.
Next, connect the printer to a power source using the power cable. Once the printer is powered on, you’ll need to connect it to your computer using the USB cable. If your computer doesn’t have a USB port, you can also connect the printer to your network using an Ethernet cable.
Though the printer comes with a starter toner cartridge, it’s always a good idea to have a replacement cartridge on hand. This helps to ensure that you never run out of ink when you need it the most.
Lastly, the user manual and installation CD should be placed in a location where they can be easily accessed. The user manual provides important information on how to use the printer and troubleshoot any issues that may arise. The installation CD contains the necessary software and drivers that need to be installed on your computer for the printer to work properly.
Unboxing your new Samsung printer is the first step in setting it up. Now that you have unboxed the printer and have all the necessary components, you’re ready to move on to the next step of the setup process.

3. Checking the printer specifications and compatibility with your computer
Before setting up your Samsung printer, it’s important to check its specifications and compatibility with your computer. You don’t want to go through the hassle of setting up your printer only to find out that it’s not compatible with your computer.
Firstly, check the model number of your printer and ensure that it’s the same model number as the one you purchased. You can usually find this information on the box or on the printer itself.
Next, check the printer’s specifications such as its connectivity options, print speed, and resolution. This will give you an idea of what your printer is capable of and whether it meets your printing requirements.
Once you’ve checked the printer’s specifications, it’s important to check its compatibility with your computer. You can do this by checking the system requirements for the printer driver. The printer driver is the software that allows your computer to communicate with your printer.
Samsung printers usually come with a CD that contains the printer driver software. However, if your computer doesn’t have a CD drive, you can download the software from Samsung’s website. Make sure to download the correct software for your printer model and your computer’s operating system.
By checking the printer specifications and compatibility with your computer, you can ensure a smooth and hassle-free setup process for your Samsung printer.
4. Downloading and installing the printer driver
Once you have your printer out of the box and set up, the next step is to download and install the printer driver. This is a crucial step as the driver is what communicates with your computer and allows it to print documents.
The first thing you need to do is to visit the Samsung website and search for the printer model you have. Once you find it, navigate to the ‘Support’ or ‘Downloads’ section, where you’ll find the printer driver you need.
When downloading the driver, ensure that you choose the correct version that corresponds with your computer’s operating system. Once the download is complete, run the installation wizard and follow the prompts to complete the installation process.
During the installation process, you may be asked to connect your printer to your computer. If you haven’t already done so, connect the printer to your computer using a USB cable. Once connected, the printer driver should automatically detect the printer and configure it for use.
Finally, once the driver has been installed, you should run a test print to ensure that everything is working correctly. If the printer produces a test page, then you’re good to go and can start printing your documents right away!
5. Connecting the printer to your computer
Connecting your Samsung printer to your computer is the next step in setting up your Samsung printer. This can be done in a few different ways, depending on your preferences and the type of connection available on your computer.
One of the most common ways to connect a printer to a computer is via a USB cable. To do this, simply plug the USB cable into the printer and the other end into an available USB port on your computer. The driver installation process should begin automatically, but if it doesn’t, you can download and install the drivers from the Samsung website.
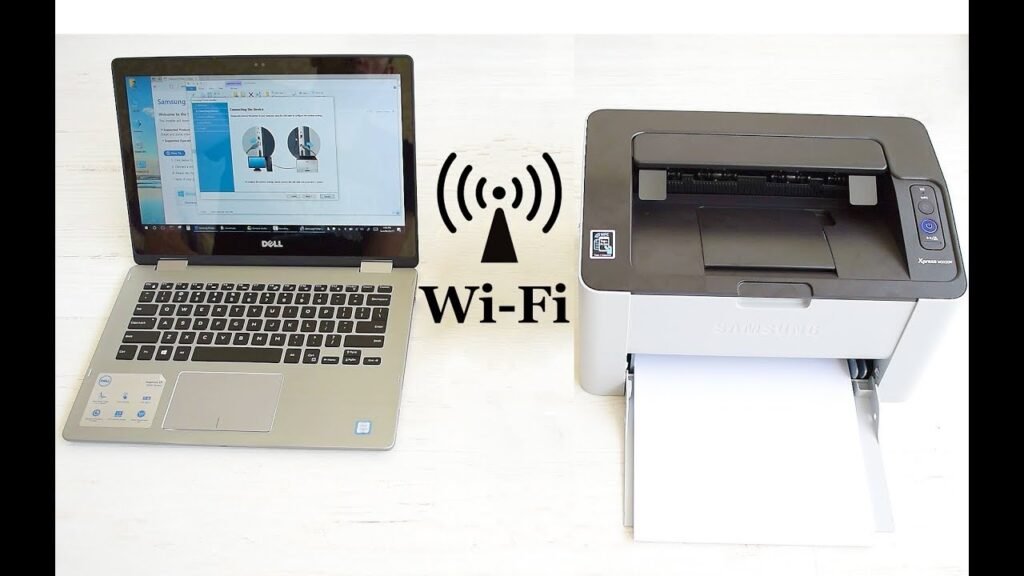
If your printer has wireless capabilities, you can connect it to your computer via Wi-Fi. To do this, access the printer’s settings menu and select the Wi-Fi option. Follow the prompts to connect the printer to your Wi-Fi network. Once the printer is connected to the network, you can add it to your computer by going to the Devices and Printers menu in your computer’s Control Panel.
Another option for connecting your Samsung printer to your computer is via Ethernet cable. This is a great option for businesses or households with multiple computers that need to share a printer. Simply connect the printer to your router or switch using an Ethernet cable, then install the printer drivers on each computer that needs access to the printer.
No matter which method you choose, connecting your Samsung printer to your computer is a quick and easy process that only takes a few minutes. Once the connection is established, you’ll be able to start printing documents and photos in no time.
6. Configuring the printer settings
After successfully connecting your Samsung printer to your computer, the next step is configuring the printer settings to make sure it’s running smoothly. There are a few basic settings you should check to ensure your printer is set up correctly.
The first thing you want to do is check the printer’s default paper size. Most printers will default to letter size (8.5 x 11 inches), but if you use a different size of the paper, you need to change this setting. To do this, go to “Printers and Devices” on your computer, right-click on your printer, and select “Printer Preferences.” Click on the “Paper/Quality” tab and select the size of paper you’re using.
Another important setting to check is the print quality. If you’re printing documents that don’t require high-quality printing, you can adjust the settings to print in draft mode or with lower print quality to save ink and speed up the printing process. On the same “Paper/Quality” tab, you can adjust the print quality settings to suit your needs.
You should also check the printer’s connectivity settings if you’re using a wireless printer. Make sure the printer is connected to the correct Wi-Fi network and that it’s connected securely. You can find this information in the printer’s manual or by going to the printer’s settings menu on your computer.
Finally, it’s a good idea to run a test print to make sure everything is set up correctly. Print a test page from your computer or use the printer’s built-in test page feature to ensure that the printer is working as it should. If you’re having any issues with your printer, consult the user manual or contact Samsung customer support for assistance.
7. Testing the printer by printing a test page
Now that you have successfully connected your Samsung printer to your computer, it’s time to test if it’s working properly. The easiest way to do this is by printing a test page.
To print a test page, go to the “Printers and Scanners” section on your computer and locate your Samsung printer. Right-click on it and select “Properties.” Then, click on the “Print Test Page” button.
If the printer is properly connected and configured, the test page should print without any issues. But if there are any problems, you may see error messages on your computer or the printer may not respond.
If you encounter any issues, double-check that the printer is properly connected to your computer and that the drivers are installed correctly. You may also need to check the ink or toner levels and replace them if necessary.
Once you have successfully printed a test page, you can start using your Samsung printer for all your printing needs. Whether you need to print documents for work or school, or photos for personal use, your Samsung printer will provide high-quality results quickly and easily.

8. Troubleshooting common issues during setup (e.g. connectivity issues)
Even with the most user-friendly devices like Samsung printers, sometimes things can go wrong during setup. Here are some common issues that users may experience and how to troubleshoot them.
Connectivity issues are one of the most common issues that users face while setting up their Samsung printers. If you’re having trouble connecting to your printer, first make sure that the printer is properly connected to the power source and turned on. Check that your device is connected to the same Wi-Fi network as the printer. You can also try resetting the printer’s wireless network settings and try connecting again.
Another issue that users may encounter is the printer not being detected by their devices. If this happens, try restarting your printer and device. Make sure that your printer and device are both updated with the latest software and check that the printer driver is installed properly on your device.
If you’re experiencing issues with print quality, first check that your ink or toner levels are sufficient. You can also try cleaning the print heads or running a printer diagnostic to identify any potential issues with the hardware.
Finally, if you’re still experiencing issues after troubleshooting, consult the user manual or contact Samsung customer support for further assistance. With a little patience and persistence, you can quickly resolve any issues and have your Samsung printer up and running in no time.
9. Tips on maintaining your Samsung printer for optimal performance
Maintaining your Samsung printer is crucial for its optimal performance. There are some simple tips that you can follow to ensure that your printer operates at its best:
1. Keep your printer clean: Regularly clean your printer with a dry or slightly damp cloth to prevent dust and debris from building up inside the machine. Avoid using harsh chemicals as they can damage the printer.
2. Use high-quality ink and toner cartridges: Always use original Samsung ink and toner cartridges to ensure that your printer produces high-quality prints and to prevent damage to the printer’s internal components.
3. Replace cartridges when necessary: Replace your ink and toner cartridges when they run out of ink or toner, or when you notice a decline in print quality.
4. Update your printer’s software: Keep your Samsung printer’s software up to date to ensure that it runs smoothly and efficiently.
5. Use the printer regularly: Use your Samsung printer regularly to prevent the ink or toner from drying out and clogging the nozzles.
By following these tips, you can ensure that your Samsung printer operates at its best and produces high-quality prints every time. And if you ever experience any issues with your printer, refer to the user manual or contact Samsung’s customer support for assistance.
10. Conclusion: Enjoy your newly installed Samsung printer!
Congratulations! You have successfully completed the set-up process for your Samsung printer. We hope that this step-by-step guide has been helpful and that you were able to follow each instruction with ease.
Now that your printer is installed and ready to use, you can start printing high-quality documents, images, and photos in no time. Whether it’s for personal or professional use, having a reliable printer is essential in today’s fast-paced world.
Remember to keep your printer’s software up to date to ensure that it performs at its best. You can easily check for updates by visiting Samsung’s website or using the Samsung Printer Manager software.
In case you encounter any issues or have questions about your Samsung printer, you can always refer to the user manual or contact Samsung’s customer support for assistance.
We hope that you enjoy your newly installed Samsung printer and that it will serve you well for years to come!
We hope you found our step-by-step guide on how to set up your Samsung printer to be helpful. We know that setting up a new printer can be a frustrating and time-consuming process, but with our guide, you should be able to get your printer up and running in no time! Whether you’re using your printer for work or personal use, having it set up properly is crucial. Remember, if you encounter any issues or have any questions during the setup process, don’t hesitate to reach out to Samsung’s customer support team for assistance. Happy printing!