

How to Setup Your Lexmark Printer can be a daunting task, especially if you are not tech-savvy. But fear not! With this step-by-step guide, setting up your Lexmark printer has never been easier. Lexmark printers are known for their reliability, affordability, and high-quality printing capabilities. Whether you are setting up your printer for the first time or need to reinstall it after a software update, this guide will walk you through every step of the process. From unpacking and connecting your printer to installing the software and configuring your settings, you will be up and running in no time. So, let’s get started and make your Lexmark printer setup a breeze!

1. Introduction to the Lexmark Printer
Lexmark is a reliable and popular brand of printers that are easy to set up and use. These printers come in a variety of models from compact inkjet printers to large office printers that can handle high volumes of printing. With their user-friendly interface and state-of-the-art technology, Lexmark printers are a great choice for both personal and professional use.
Before setting up your Lexmark printer, make sure you have all the necessary components that came in the box. This typically includes the printer itself, power cable, USB cable, ink or toner cartridges, and a user manual. Familiarizing yourself with the user manual before starting the setup process can help you avoid any mistakes or issues that may arise.
The setup process for a Lexmark printer is usually straightforward and can be done in a few simple steps. This includes connecting the printer to a power source, installing the ink or toner cartridges, connecting the printer to your computer, and downloading any necessary drivers or software. Once you have completed these steps, your Lexmark printer will be ready to use.
Whether you are setting up a new Lexmark printer or replacing an old one, this step-by-step guide will provide you with detailed instructions to ensure a smooth setup process. With a little patience and attention to detail, you can have your Lexmark printer up and running in no time.
2. Unboxing and assembling your printer
Congratulations on purchasing a new Lexmark printer! Before you can start printing, you’ll need to unbox and assemble your printer. Here’s how:
Step 1: Unbox your printer
Carefully remove your printer from its packaging. Make sure to save all the packaging materials in case you need to return the printer or move it later.
Step 2: Remove all tape and protective materials
Remove all the tape and protective materials from your printer. This includes any plastic coverings, foam inserts, and cardboard inserts. Be sure to check all compartments and trays for any remaining materials.
Step 3: Install the ink cartridges
Locate the ink cartridges that came with your printer and follow the instructions to install them. Make sure to remove any protective tape or packaging from the cartridges before inserting them.
Step 4: Connect the power cord and turn on the printer
Plug in the power cord and connect it to your printer. Turn on your printer and wait for it to initialize.
Step 5: Connect your printer to your computer
Connect your printer to your computer using a USB cable or Wi-Fi connection. Follow the instructions provided with your printer to connect to your computer.
Step 6: Load paper into the printer
Load paper into your printer’s paper tray or feeder. Make sure to adjust the paper guides to fit the size of the paper you’re using.
Congratulations! You have successfully unboxed and assembled your new Lexmark printer. Now you’re ready to start printing.
3. Installing the printer software on your computer
Now that you have connected your Lexmark printer to your computer, it’s time to install the printer software. Installing the printer software is a crucial step in setting up your printer and ensuring it works properly.
To install the software, you can either use the installation disc that came with your printer or download the software from the Lexmark website. If you choose to download the software from the website, make sure to select the correct software for your printer model and operating system.
Once you have the software downloaded or the installation disc inserted, follow the on-screen instructions to install the software. The installation process will vary depending on your operating system, but typically you will be prompted to agree to the terms and conditions, select your preferred language, and choose the type of installation – either a full installation or a custom installation.
During the installation process, you may be prompted to connect your printer to your computer again. Make sure to follow the instructions carefully and connect the printer to the computer when prompted.
After the installation is complete, you may be asked to restart your computer. Once you have restarted your computer, your Lexmark printer should be fully installed and ready to use.
If you encounter any issues during the installation process, refer to the user manual or Lexmark support website for troubleshooting tips. With the software installed, you can now start printing and enjoying the full functionality of your Lexmark printer.
4. Connecting your printer to your Wi-Fi network
Connecting your Lexmark printer to your Wi-Fi network is a crucial step in ensuring that your printer is accessible from all connected devices. Here are the steps to connect your Lexmark printer to your Wi-Fi network:
Step 1: Make sure your printer is turned on and in a ready state.
Step 2: Press the “Menu” button on your printer’s control panel.
Step 3: Use the arrow keys to navigate to “Network/Ports” and press “OK.”
Step 4: Select “Wireless” and press “OK.”
Step 5: Select “Wireless Setup Wizard” and press “OK.”
Step 6: Follow the on-screen instructions to connect your printer to your Wi-Fi network. You may need to enter your Wi-Fi network name and password.
Step 7: Once your printer is connected to your Wi-Fi network, you can print wirelessly from any device that is also connected to the same network.
It’s important to note that the steps may differ slightly depending on the model of your Lexmark printer. However, these general steps should guide you in connecting your printer to your Wi-Fi network. If you encounter any issues, refer to your printer’s user manual or contact Lexmark customer support for assistance.
5. Set up your printer preferences
Setting up your printer preferences is an important step in the setup process of your Lexmark printer. This will help to ensure that your printer is set up to your specific needs and that you can get the most out of its features.
To begin setting up your printer preferences, you should start by opening the Lexmark Printer software on your computer. From here, you can navigate to the printer settings and preferences section. Here, you will be able to choose your preferred print quality, paper size, and orientation.
You can also set up your printer to print in black and white or color, depending on your requirements. Additionally, you may want to set up your printer to use specific ink cartridges or other consumables.
Another important preference to consider is the type of connection you want to use. You can choose to connect your printer via USB cable or over Wi-Fi, depending on your preferences and the capabilities of your printer.
Once you have set up your printer preferences, you should test your printer to ensure that everything is working correctly. You can print a test page to check the quality of your printer and ensure that it is set up to your specific needs.
Overall, setting up your printer preferences is an important step in getting the most out of your Lexmark printer. Taking the time to customize your settings will help you to optimize your printing experience and ensure that you are happy with the results.
6. How to print a test page
Now that you have completed the setup of your Lexmark printer, it’s essential to print a test page to ensure that everything is in working order. Printing a test page is a quick and easy process that will give you peace of mind and save you time in the long run. Here’s how to do it:
1. Ensure that your Lexmark printer is properly connected to your computer and turned on.
2. Click on the ‘Start’ button on your computer and search for the ‘Devices and Printers option.
3. Locate your Lexmark printer and right-click on it to open the dropdown menu.
4. Select the ‘Printer Properties’ option from the dropdown menu.
5. Click on the ‘Print Test Page’ button located at the bottom of the ‘General’ tab.
6. Wait for the page to finish printing.
If the test page prints successfully, then congratulations! Your Lexmark printer is now set up and ready for use. However, if the page does not print or there are any issues, review the setup process and ensure that all connections are secure and that the printer drivers are installed correctly. By completing this simple test, you can avoid any frustration or delays when you need to print important documents or photos.
7. Troubleshooting common issues with the printer
No matter how advanced or high-tech your Lexmark printer is, there are still chances of running into some common issues that can be frustrating. These issues can range from connectivity problems to paper jams, and they can happen at any time. However, the good news is that most of these issues can be easily fixed with some basic troubleshooting steps.
One of the most common issues with any printer is connectivity problems. If your Lexmark printer is not being detected by your computer or is unable to connect to your wireless network, you should try resetting the printer’s network settings or reconfiguring the printer’s connection settings.
Another common issue is paper jams. This can happen if you use the wrong type of paper or if the paper tray is not properly aligned. To fix this issue, you can try removing the jammed paper, checking the paper tray to ensure it’s properly aligned, and also check the printer’s rollers for any obstructions.
If your printer is producing blurry or faint prints, you may need to check the ink levels and also ensure that the print heads are clean. You can do this by running the printer’s cleaning cycle from the printer settings menu.
In the event that none of these troubleshooting steps seem to work, it may be time to contact Lexmark’s customer support team for further assistance. They can provide you with more specific guidance on how to resolve any more complex issues with your printer.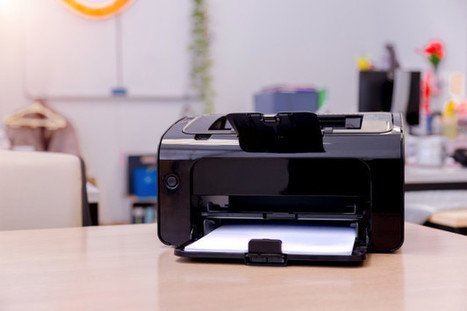
8. How to update the printer firmware
Updating the firmware of your Lexmark printer is essential to ensure optimal performance, and it’s a relatively straightforward process. Here’s how to do it:
1. Visit the Lexmark support website and search for your printer model.
2. Locate the firmware update for your printer and download it to your computer.
3. Connect your printer to your computer using a USB cable.
4. Turn on your printer and wait for it to be recognized by your computer.
5. Open the firmware update file you downloaded earlier and run the installation wizard.
6. Follow the on-screen instructions to install the firmware update on your printer.
7. Once the installation is complete, disconnect the USB cable and restart your printer.
It’s important to note that you should never turn off your printer or computer during the firmware update process, as this can cause serious damage to your printer. Additionally, make sure to always download firmware updates from the official Lexmark support website to ensure that you’re getting the correct and most up-to-date software for your printer. By following these steps, you’ll be able to update your Lexmark printer’s firmware quickly and easily, ensuring that it performs at its best.
9. Maintaining your Lexmark printer
Maintaining your Lexmark printer is essential in ensuring that it remains in good working condition and produces high-quality prints. Regular maintenance can also help extend the life of your printer and save you money on costly repairs or replacements.
One of the most important aspects of printer maintenance is cleaning. Over time, dust and debris can accumulate inside your printer, which can cause jams and affect print quality. To prevent this, it’s recommended that you clean your printer regularly.
To clean your Lexmark printer, start by turning it off and unplugging it from the power source. Next, remove any paper and ink cartridges from the printer. Using a soft, dry cloth, gently wipe the exterior of the printer to remove any dust or debris. You can also use a can of compressed air to blow away any dust from hard-to-reach areas.
To clean the interior of your printer, use a lint-free cloth dampened with water to gently wipe away any dust or debris. Be sure to avoid using any harsh chemicals or abrasive materials, as these can damage your printer.
It’s also important to replace your ink cartridges and other consumables as needed. Check your printer manual to see how often your specific model requires new cartridges and be sure to replace them promptly. This will help ensure that your prints are of the highest quality.
By following these simple maintenance tips, you can keep your Lexmark printer running smoothly and producing high-quality prints for years to come.
10. Conclusion and additional resources.
Congratulations! You have successfully set up your Lexmark printer. Now, you are ready to start using it for all your printing needs. If you have followed all the steps mentioned in this guide, you should have no problem in setting up your printer and connecting it to your computer or mobile device.
In case you encounter any issues during the setup process or while using the printer, don’t worry, there are a lot of resources available online to help you out. The Lexmark website has a dedicated support section where you can find solutions to common problems, download drivers and software updates, and even get in touch with their technical support team for any assistance.
Additionally, there are several online forums and communities where Lexmark printer users share their experiences and help each other out with troubleshooting tips and tricks. You can also find instructional videos on YouTube that provide a visual guide to setting up and using your Lexmark printer.
In conclusion, setting up your Lexmark printer may seem daunting at first, but with this step-by-step guide, you should be able to do it with ease. Remember to follow the instructions carefully, and don’t hesitate to seek help if you need it. With your printer up and running, you can now enjoy high-quality prints for all your personal and professional needs.
We hope you found our step-by-step guide on setting up your Lexmark printer helpful. Technology can be a challenge, but with our easy-to-follow instructions, you should now be able to get your printer up and running in no time. Remember, if you have any questions, don’t hesitate to reach out to customer support or refer back to our guide. We are happy to help you out with any further assistance you may need!
——————————

